

TM 9-2350-222-20-1-5
RIGHT ANGLE DRIVE REPLACEMENT (Sheet 3 of 5)
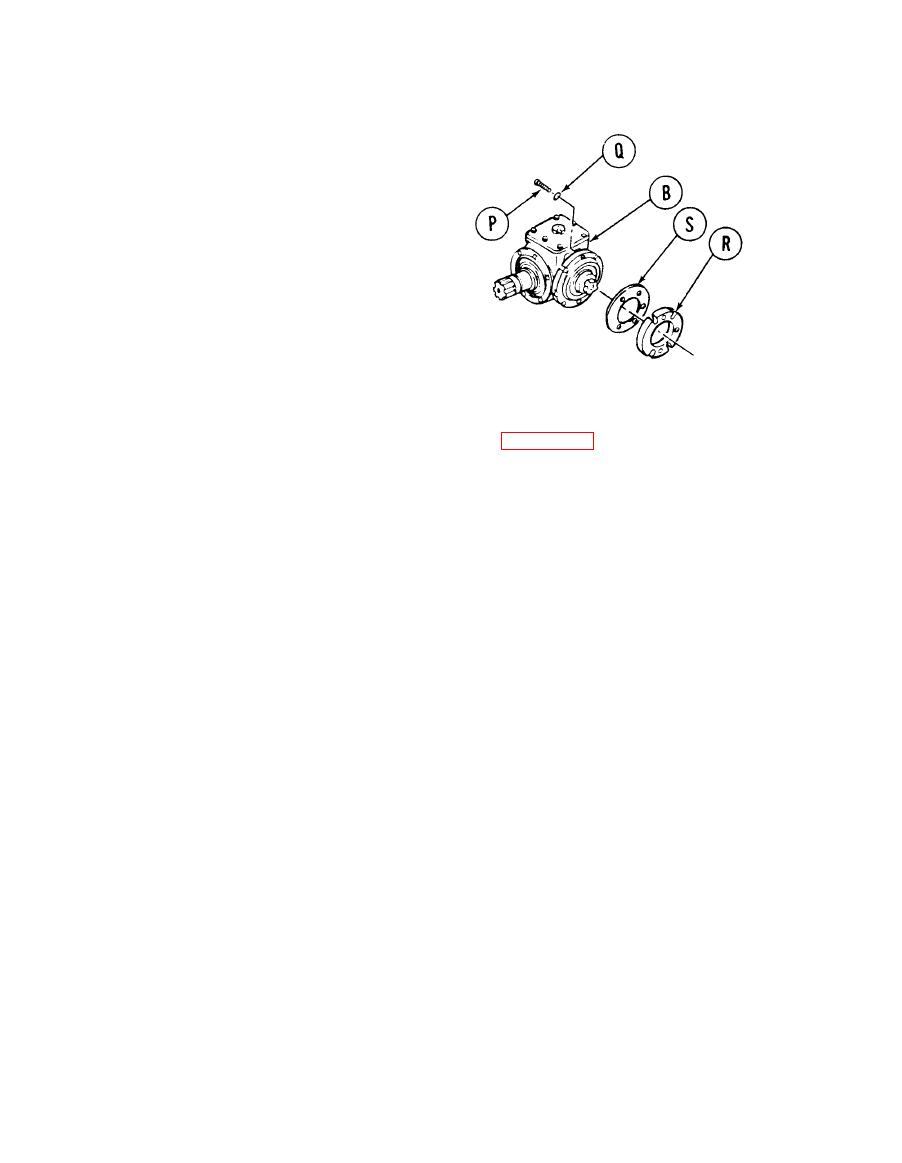
10. Using 1/2 inch wrench, remove two screws (P)
and lockwashers (Q). Throw lockwashers away.
11. Remove spacer assembly (R) and gasket (S).
Throw gasket (S) away.
NOTE
If necessary, tap spacer assembly
(R) gently with screwdriver and
hammer to separate from right
angle drive (B).
CLEANING AND INSPECTION:
1.
Clean all metallic parts in dry cleaning solvent (Item 54, Appendix D).
2.
Inspect all parts for damage or wear.
3.
Replace all unserviceable parts.
Go on to Sheet 4
TA141212
