TM 9-2350-222-20-1-5
BILGE PUMP REPLACEMENT (Sheet 3 of 6)
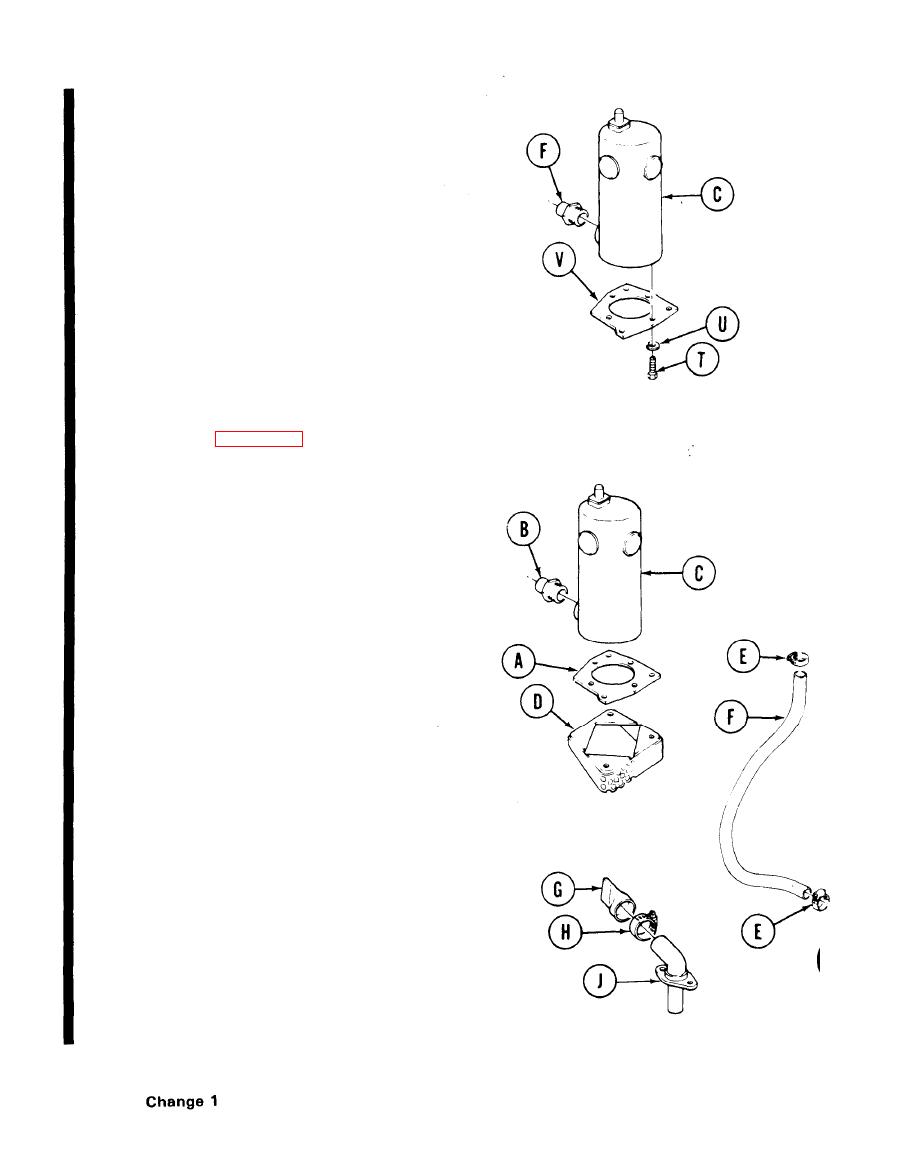
19. Using 2 inch wrench, remove bilge pump
adapter (F) from bilge pump assembly (C).
20. Using 7/16 inch wrench, remove four
screws (T) and lockwashers (U) from
mounting plate (V) and bilge pump assem-
bly (C). Remove plate (V). Throw lock-
washers away.
CLEANING AND INSPECTION:
NOTE
Before inspection, clean all
parts thoroughly with clean
rags and dry cleaning solvent
(Item 54, Appendix D).
1.
Check bilge pump mounting plate (A) for
cracks, corrosion, or excessive wear. Re-
place if required.
2.
Check threads on adapter (B) for corrosion,
wear, and damaged threads. Replace if
required.
3.
Check bilge pump (C) for corrosion, cracks,
and wear. Replace if required.
4.
Check screen (D) for corrosion, excessive
dirt, or damage. Replace if required.
5.
Check hose clamps (E) for corrosion and
wear. Check screw and nut threads for
damage. Replace if required.
6.
Check hose (F) for breaks, cracks, or wear.
Replace if required. Reposition hose (F)
after inspection.
7.
Check valve (G) for cracks, corrosion, and
wear. Replace if required.
8.
Check clamp (H) for corrosion and wear.
Check screw and nut threads for damage.
Replace if required.
9.
Check elbow (J) for cracks, breaks,
corrosion, and wear. Replace if required.
Go on to Sheet 4
TA253847


