

TM 9-2350-222-34-1
HYDRAULIC RESERVOIR REPLACEMENT (Sheet 9 of 15)
NOTE
Remove all dust caps from tube
assemblies as they are installed.
NOTE
Apply sealing tape (Item 8, Appendix
installed.
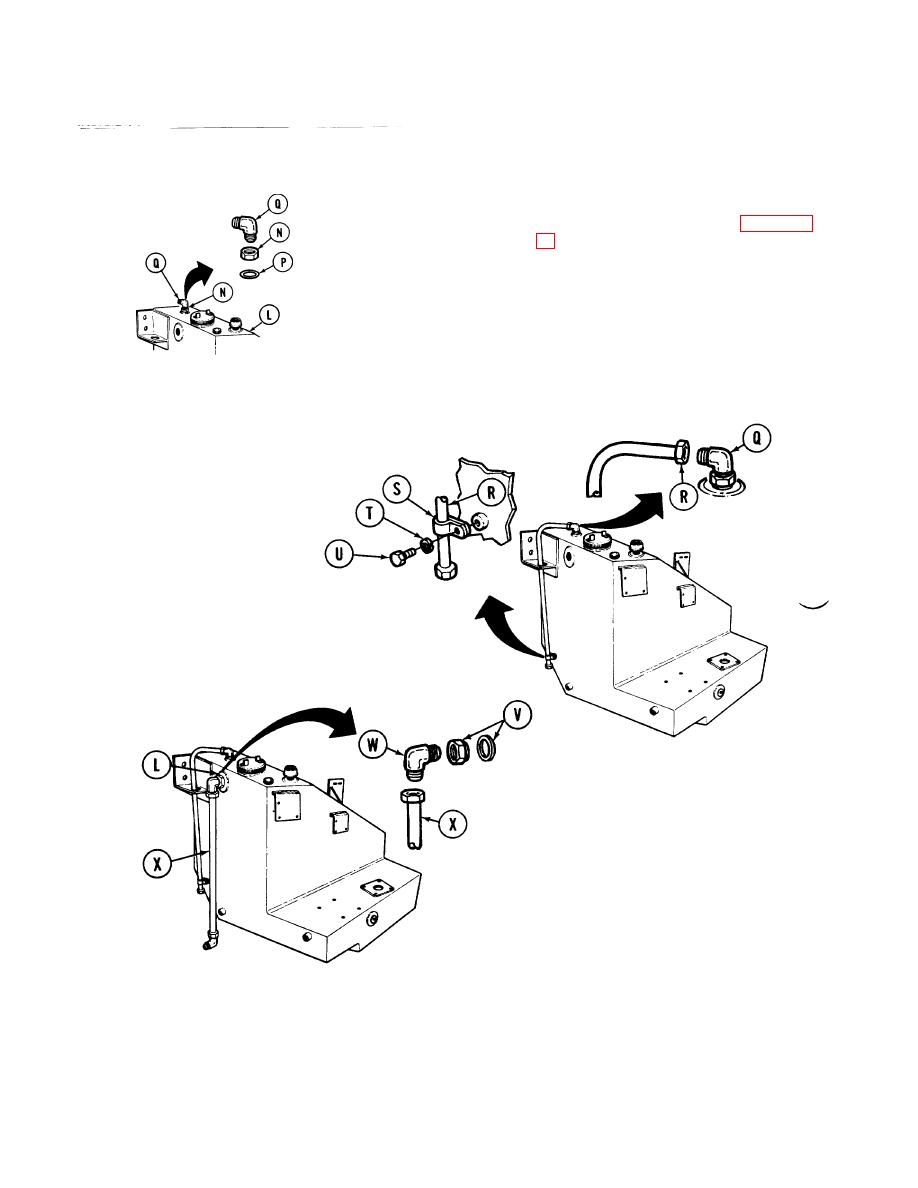
8.
Put nut (N) and new packing (P) on elbow (Q)
and thread elbow into reservoir (L).
9.
Using adjustable wrench on elbow (Q) and 13/
16 inch wrench on nut (N), position elbow and
tighten nut.
10.
Start nut of tube assembly (R) on elbow (Q).
11.
Position clamp (S) on tube
assembly (R).
12.
Using 7/16 inch socket, install
lockwasher. (T) and screw (U)
through clamp (S).
13.
Using 11/16 inch wrench,
tighten nut of tube assembly
(R).
14.
Put nut and new packing (V) on elbow
(W) and thread elbow into reservoir (L).
15.
Using adjustable wrench to hold elbow
(W), use 1-5/8 inch wrench and tighten
nut (V).
16.
Using 1-1/2 inch wrench on nut of tube
assembly (X), install tube assembly with
its assembled parts to elbow (W).
Go on to Sheet 10
TA130835
12-10
