

TM 9-2350-222-20-1-4
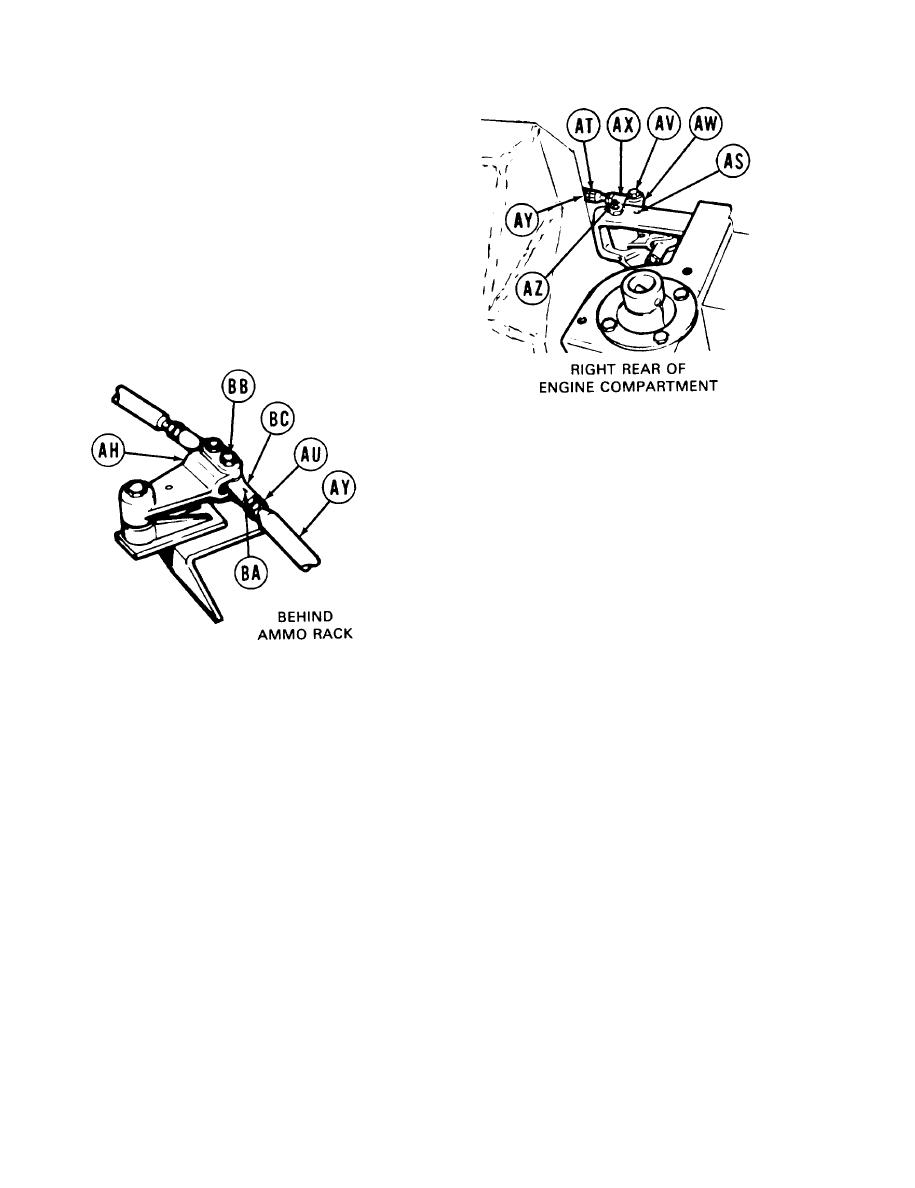
SHIFT LINKAGE ADJUSTMENT (Sheet 13 of 20)
87. Using 9/16 inch wrench, adjust shifting rod
bearing end (AX) by turning clockwise until
shifting rod (AY) is past hole (AZ).
88. Using 9/16 inch wrench, remove screw (BB).
89. Using 9/16 inch wrench, install screw (AV)
through clevis (AW) and shifting rod bearing
end (AX).
90. Using crowfoot and torque wrenches, tighten
jamnut (AT) to 15-20 lb-ft (20-27 N.m).
91. Using 9/16 inch socket and torque wrench,
tighten screw (AV) to 15-20 lb-ft (20-27 N.m).
92. Using 9/16 inch wrench, adjust shifting rod
bearing end (BC) by turning clockwise or
counterclockwise until screw (BB) drops freely
through clevis (AH) and shifting rod bearing
end (BC).
93. Using 9/16 inch wrench, install screw (BB).
94. Using crowfoot and torque wrenches, tighten jamnut (AU) to 15-20 lb-ft (20-27 N.m). Remove locating
pin from alinement hole (AS).
95. Using 9/16 inch socket and torque wrench, tighten screw (BB) to 15-20 lb-ft (20-27 N.m) and go on to
step 106.
96. Using 9/16 inch wrench, remove screw (BB).
97. Using 9/16 inch wrench, adjust shifting rod bearing end (BC) by turning clockwise until shifting rod
(AY) is past hole (BA).
Go on to Sheet 14
TA253372
11-14 Change 1
