

TM 9-2350-222-34-1
REAR DRAIN VALVE FRONT CONTROL ROD REPLACEMENT (Sheet 4 of 4)
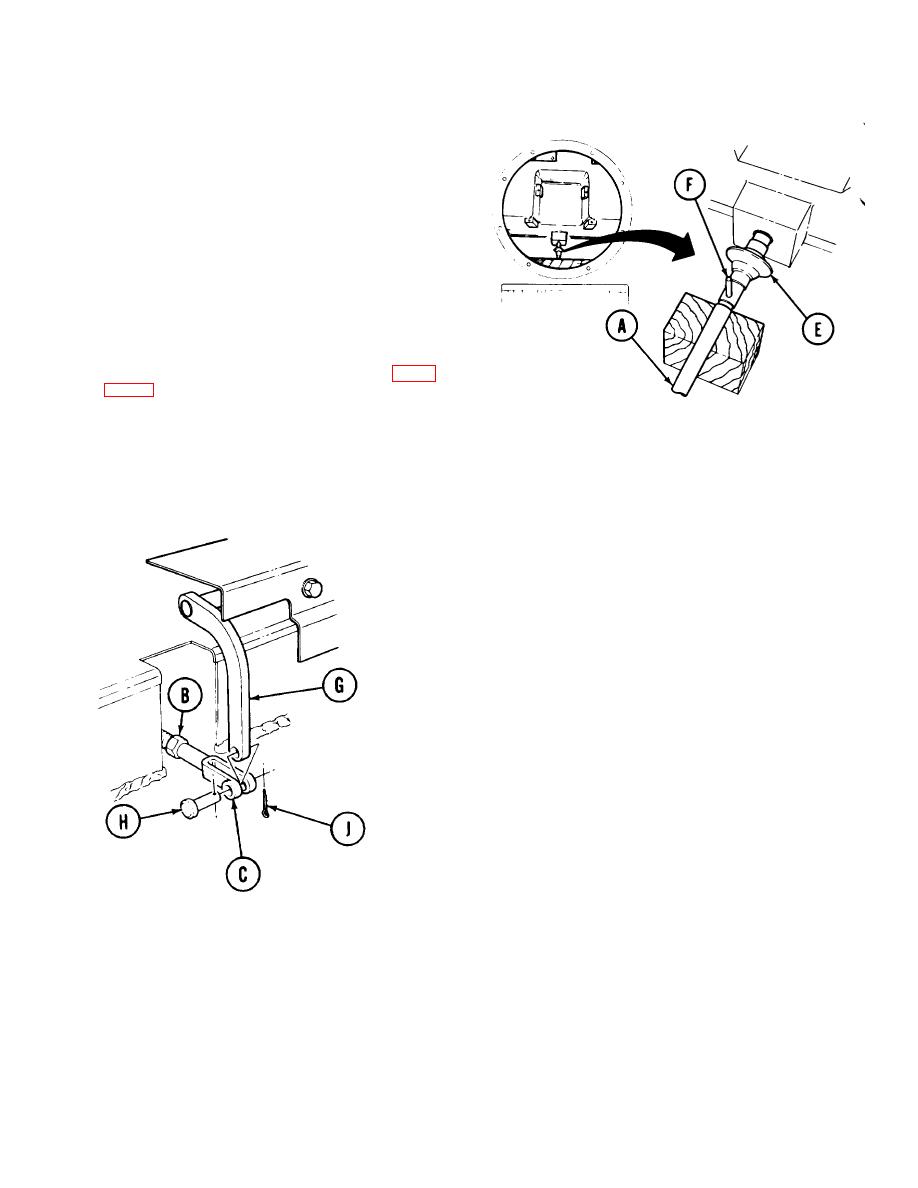
5. Go to turret and find universal joint (E).
6. Position rod (A) into universal joint (E).
7. Place wood block under rod (A) as shown.
8. Aline holes in rod (A) and universal joint (E).
9. Using hammer and punch, drive new pin (F) all
the way in hole until pin is flush with universal
joint (E).
10. Remove wood block from under rod (A).
11. If rod end at engine compartment drain valve
was removed during removal, install clevis (page
12. In driver's compartment, position clevis (C) onto
lever (G).
14. Push pin (H) through holes in clevis (C) and
13. Close engine compartment drain valve.
lever (G).
15. Using pliers, install new cotter pin (J) through pin
(H).
16. Open engine compartment drain valve.
17. Using 9/16 inch wrench, tighten jamnut (B).
18. If removed, install driver's escape hatch (TM 9-
2350-222-20-1).
19. Install driver's seat (TM 9-2350-222-10).
20. Install slipring (TM 9-2350-222-20-2).
21. Perform rear drain valve adjustment (TM 92350-
222-20-1).
End of Task
TA130809
11-12
