TM 9-2350-222-20-1-4
DUST DETECTOR WARNING LIGHT BOX ASSEMBLY AND BRACKET REPLACEMENT (Sheet 2 of 3)
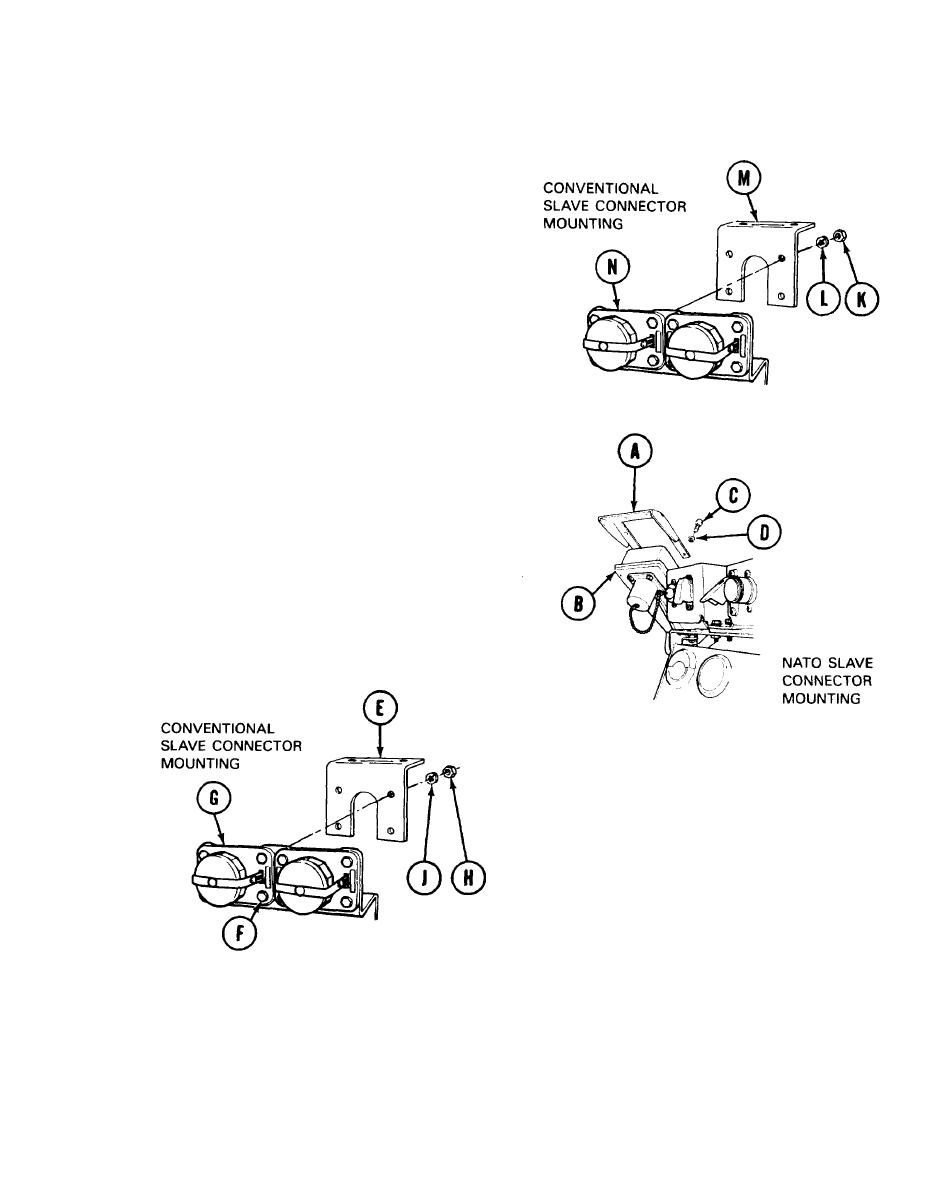
Using 7/16 inch wrench, remove four nuts
4.
(K) and lockwashers (L) securing bracket (M)
to conventional slave connector mount (N).
Remove bracket (M). Throw lockwashers
away.
INSTALLTIONN:
NOTE
If the dust detector warning light box in your vehicle
has the NATO slave connector type mounting, do
step 1, and skip step 2. If you have the conventional
slave connector type mounting, stab at step 2.
Put bracket (A) in position on NATO slave
1.
connector mount (B) and secure with four
driver.
2. Position bracket (E) on mounting screw (F)
at rear of conventional slave connector
mount (G). Using 7/l6 inch wrench, secure
bracket (E) with four nuts (H) and new
internal tooth Iockwashers (J).
TA250692
10-350.17
Change 3


