

TM 9-2350-222-20-1-4
(Sheet 5 of 6)
FINAL DRIVE (LEFT AND RIGHT) REPLACEMENT
CAUTION
Do not damage threads on
mounting studs when install-
ing studs through mounting
holes.
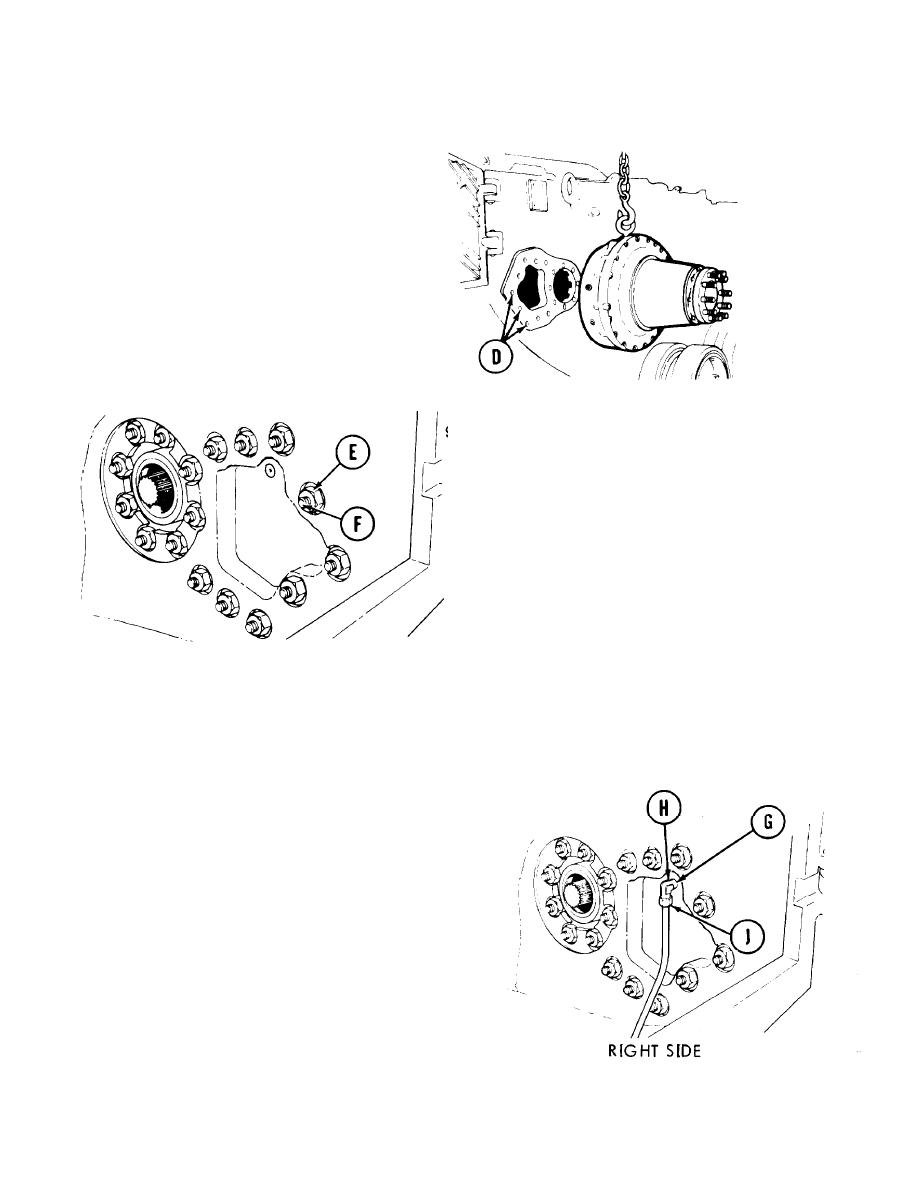
Carefully guide mounting studs through
6.
mounting holes (D) in side of hull.
Using lubricating oil (Item 44, Appendix D),
7.
oil 17 new self-locking nuts (E).
Using fingers, start threads of 17 new
8.
self-locking nuts (E) onto final drive studs (F).
Using socket or offset link, install 17 new
self-locking nuts (E).
NOTE
Use hand impact wrench offset
link with torque wrench where
torque wrench cannot be used
due to lack of space.
Using torque wrench, tighten 17 new self-
locking nuts (E) to 460-500 lb-ft (625-680
N m).
11. Remove hoist hook from final drive lifting eye.
NOTE
If your final drive is to be equipped with final drive
venting system, perform steps 12 through 26 skipping
step 21.
If your final drive is to be equipped with an air pressure
relief valve, skip steps 12 through 20.
12.Using 3/16 inch allen wrench, remove plug (G) from final drive.
Using adjustable wrench, install elbow (H)
13.
onto right final drive where plug (G) was.
14. Using fingers, connect tubing (J) to elbow (H).
using torque wrench and
15.
crowfoot wrench, tighten tubing (J) nut
75-85 lb-in (8.4-9.5 N.m).
---
Go on to Sheet 6
12-4.2 Change 1

