

TM 9-2350-222-20-1-4
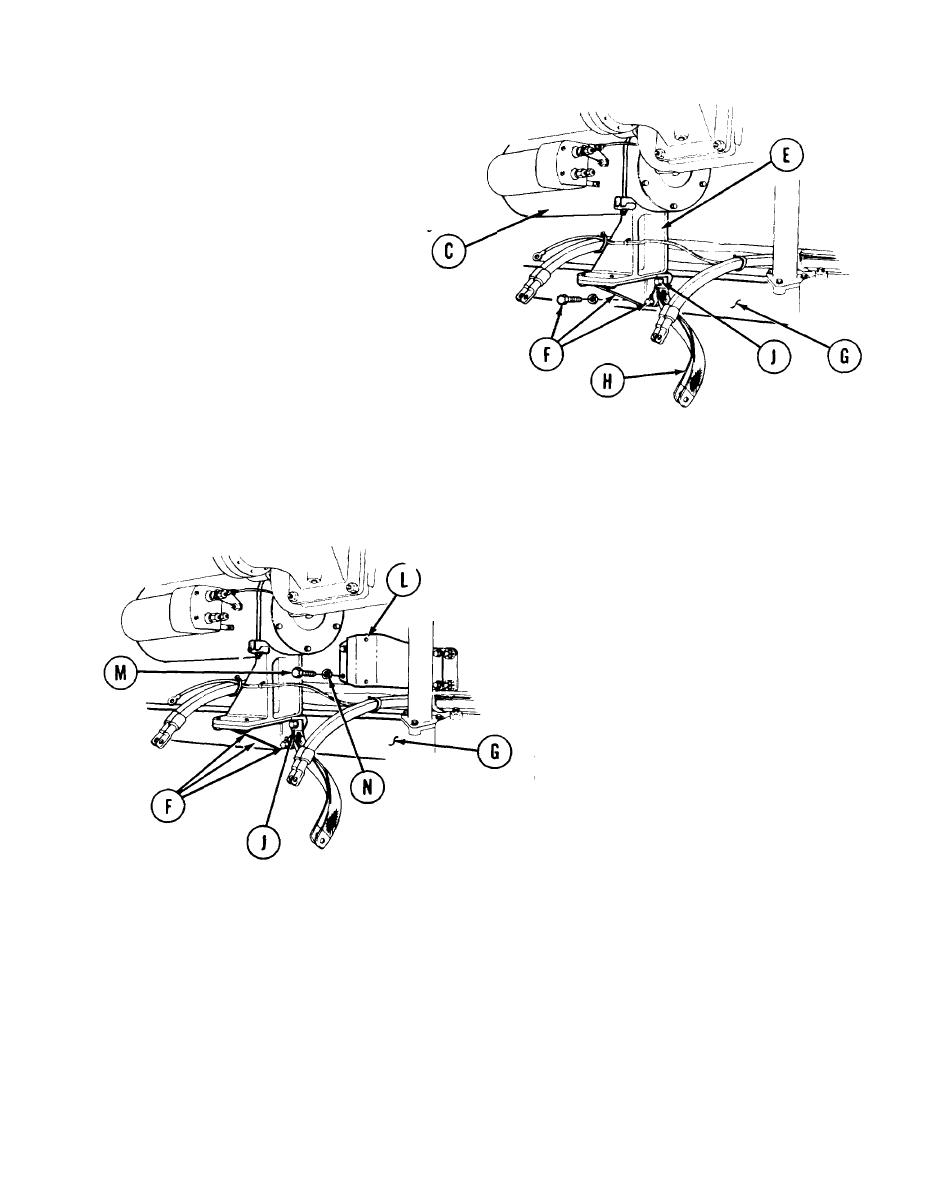
STARTER REPLACEMENT (Sheet 6 of 7)
5.
Slide starter cradle assembly bracket (E) int
position on starter (C).
Using fingers, install three screws (F) with flat
6.
washers to secure starter cradle assembly
bracket (E) to engine oil pan (G).
NOTE
When
installing
double-braided
ground strap (H) to screw (J),
make sure flat washer seats flat
against bracket face.
7.
Using fingers, install double-braided ground strap (H) with screw and flat washer (J), and install
screw to starter cradle assembly bracket (E) and engine oil pan (G) as in step 6.
8.
Using 1/2 inch wrench, tighten two
self-locking nuts evenly to be sure nuts and
U-bolts seat properly.
9.
Using 9/16 inch socket and extension, secure
four screws and flat washers (F) and (J).
NOTE
After securing bolts and flat
washers (F) and (J), check front
of starter case to be sure there
is no gap between starter case
and support cradle assembly. If
there is a gap, loosen bolts (F)
and (J) and adjust position of
cradle assembly so there is no
gap.
10. Using 1/2 inch socket and extension, secure low voltage relay solenoid bracket (L) to engine oil
pan (G) with four screws (M) and new lockwashers (N).
Go on to Sheet 7
TA139586
10-31

