

TM 9-2350-222-34-1
HEATER CONTROL WIRING HARNESS ASSEMBLY REPLACEMENT (Sheet 4 of 5)
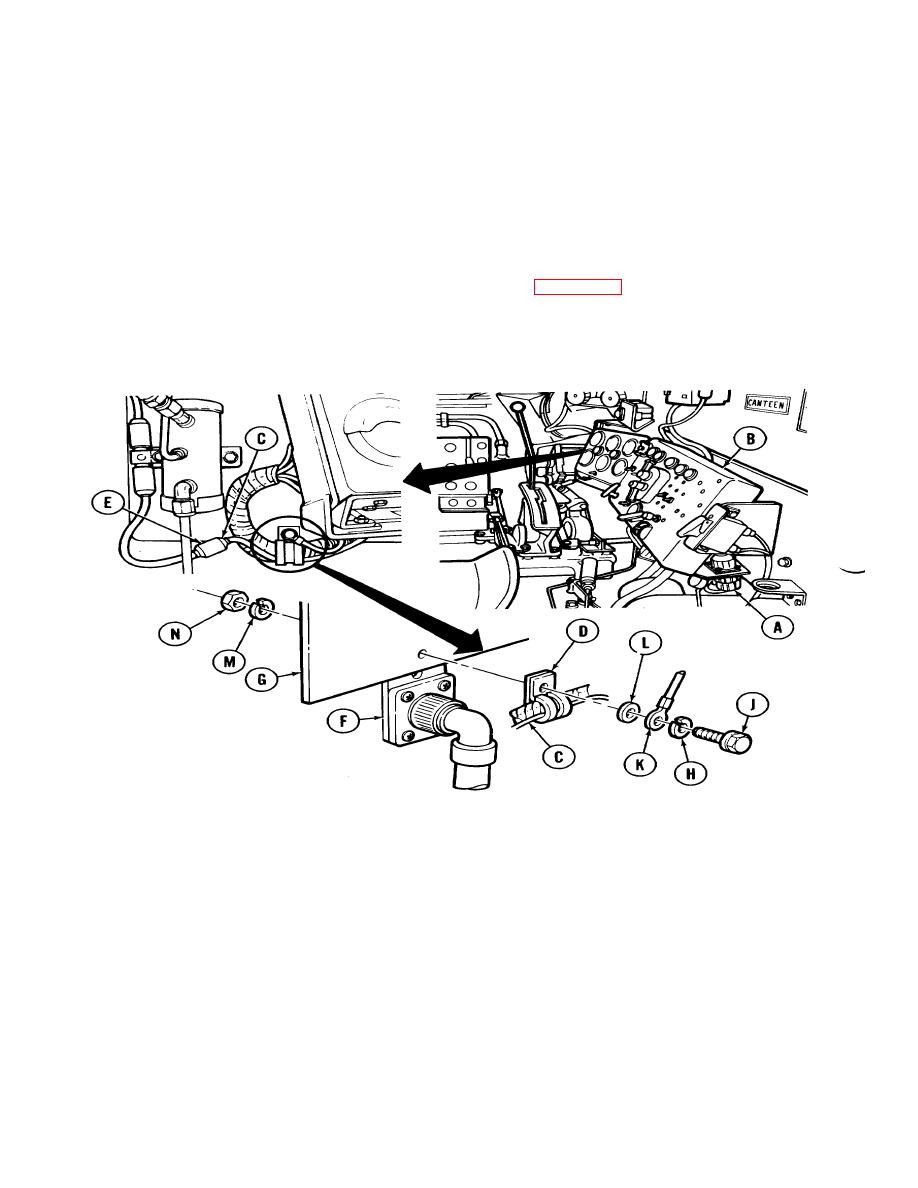
INSTALLATION:
1. Place wiring harness (A) in position in vehicle.
2. Using spanner wrench, connect one end of wiring harness (A) to master control panel (B).
3. Place lead (C) into clamp (D).
4. Lubricate connectors (C) and (E) with silicone compound (Item 10, Appendix B). Using fingers, connect connectors
(C) and (E).
5. Remove dummy housing (F) from plate (G).
6. Using fingers, install lockwasher (H) onto screw (J), screw (J) through lead (K), flat washer (L) onto screw (J), screw
(J) through clamp (C), plate (G) and dummy housing (F). Place lockwasher (M) and nut (N) onto screw (J).
7. Using 7/16 inch wrench on nut (N) and socket on screw (J), tighten assembly.
Go on to Sheet 5
TA130619
5-40
