

TM 9-2350-222-34-1
ACCELERATOR LINKAGE ASSEMBLY REPLACEMENT (Sheet 3 of 5)
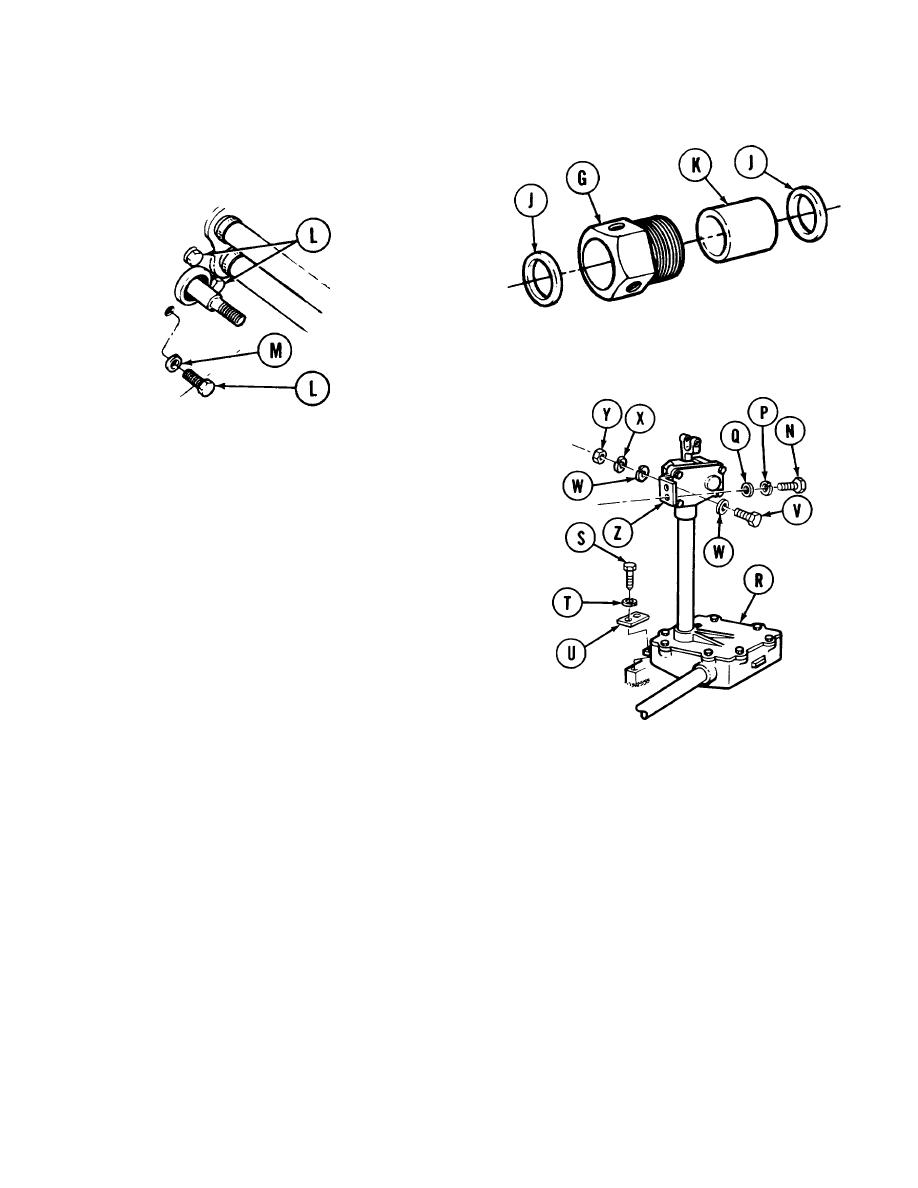
9. Using brass drift and hammer, remove two seals
(J) and bushing (K) from nut (G). Throw two
seals away.
10. Using 9/16 inch socket, remove three screws (L)
and washers (M).
NOTE
Steps 11 through 14 are performed in
left forward end of engine compartment.
11. Using 9/16 inch socket, remove two screws (N),
lockwashers (P), and flat washers (Q) securing
upper end of accelerator linkage assembly (R) to
bulkhead.
12. Using 9/16 inch socket, remove two screws (S),
lockwashers (T), and plate (U) from base of
housing accelerator linkage assembly (R).
13. Using both hands, slide entire accelerator linkage assembly toward rear of vehicle until tube assembly is free of
bulkhead.
14. Using both hands, lift and remove accelerator linkage assembly from engine compartment.
15. Using 9/16 inch socket and 9/16 inch wrench, remove two screws (V), four flatwashers (W), two lockwashers (X),
and two nuts (Y) securing bracket (Z) to accelerator linkage assembly (R). Remove and retain bracket (Z) for
installation onto replacement accelerator linkage assembly.
Go on to Sheet 4
TA130558
4-100
