

TM 9-2350-222-20-1-3
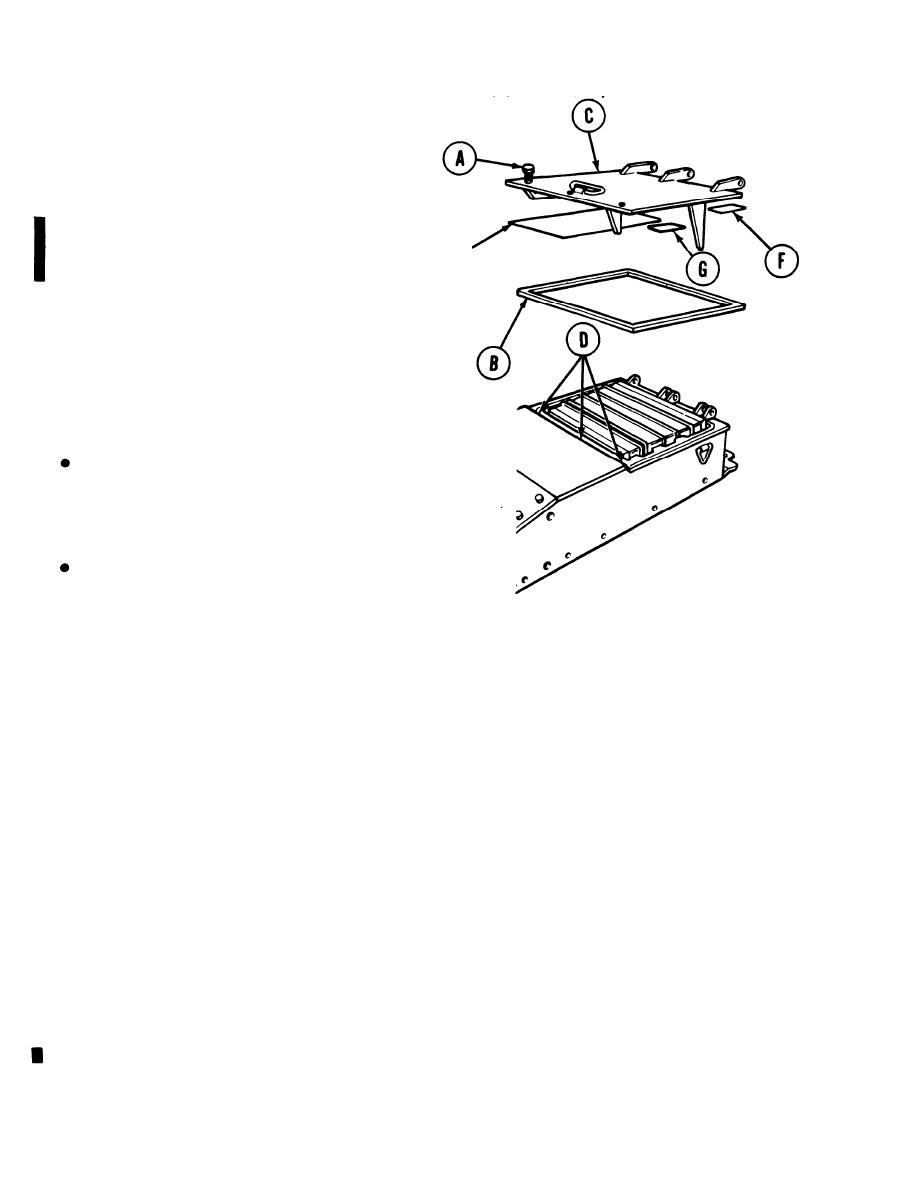
AIR CLEANER DOOR REPLACEMENT (TOP LOADING) (Sheet 2 of 3)
IN SPECTION AND REPAIR:
Inspect screws (A) and gasket (B).
1.
2.
If threads of screws (A) are stripped, replace
screws.
3*
If gasket (B) is damaged in any way, remove
it. Throw gasket (B) away.
4.
Apply Loctite adhesive (Item 75, Appendix
.
D) on new gasket (B). Install gasket into groove
at underside of door (C).
WARNING
Compressed air used for cleaning pur-
poses will not exceed 30 PSL Use only
with effective chip guarding and person-
al protective equipment (goggles/shield,
gloves, etc.).
Make sure unauthorized personnel are
not in the area when this task is being
performed. Failure to do so may result
in injury.*
5.
Inspect screw holes (D) in housing. If
holes are not drilled through, use-com-
pressed air to remove sand, dirt, or debris
from holes.
6.
Replace marker (E), identification plate
(F), or NBC warning decal (G) as necessary.
Install marker (E) and decal (G) so they can
be read from center of vehicle.
Go on to Sheet 3
All data on pages 7-105 thru 7-109 deleted.
7-104
Change 4
