

TM 9-2350-222-34-1
HYDRAULIC RESERVOIR REPLACEMENT (Sheet 11 of 15)
28.
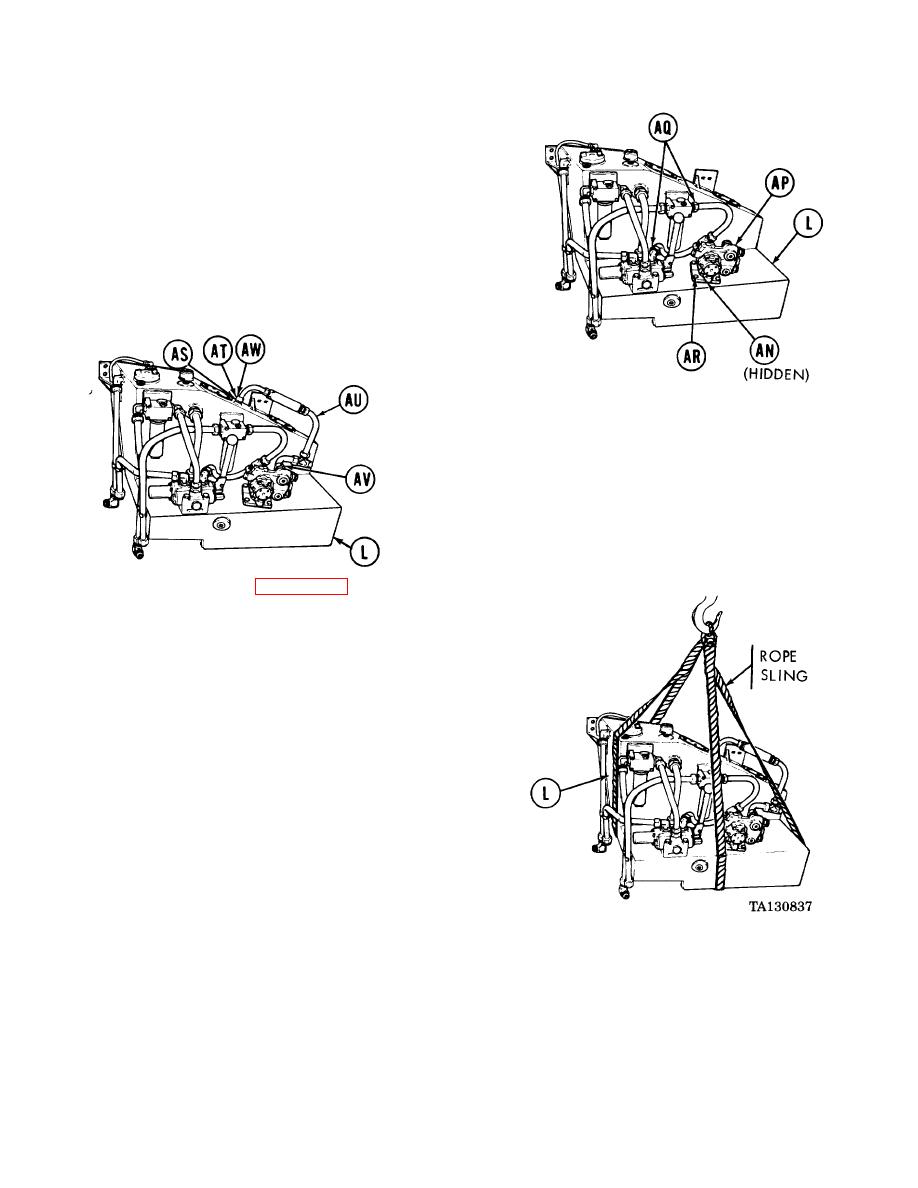
Install new packing (AN) onto control valve
mount.
29.
Position control valve (AP) with its attached parts
on reservoir (L).
30.
Start two nuts (AQ) onto filter and selector valve.
31.
Using 3/4 inch socket, install four screws and
lockwashers (AR) into control valve (AP) and
reservoir (L).
32.
Using 1-1/2 inch wrench, tighten two nuts (AQ).
33.
Place new packing (AS) on union (AT).
34.
Using 1-3/8 inch wrench, install union (AT) and
new packing (AS) into reservoir (L).
35.
Position tube assembly (AU) onto reservoir (L)
and start two nuts (AV and AW).
36.
Using 1-1/2 inch wrench, tighten nut (AV).
37.
Using 1-1/4 inch wrench, tighten nut (AW).
38.
Attach rope (Item 23, Appendix B) to reservoir
(L) as shown.
CAUTION
Place pieces of plywood or other
suitable material over batteries,
cables, tubes, and other components
to prevent damage when positioning
reservoir in vehicle.
39.
Using lifting device, place reservoir into vehicle
and remove rope sling.
Go on to Sheet 12
12-12

