

TM 9-2350-222-20-1-5
CONTROL VALVE ASSEMBLY REPLACEMENT (Sheet 8 of 12)
NOTE
Use safety pin, nail, rod or similar device to turn shaft in steps
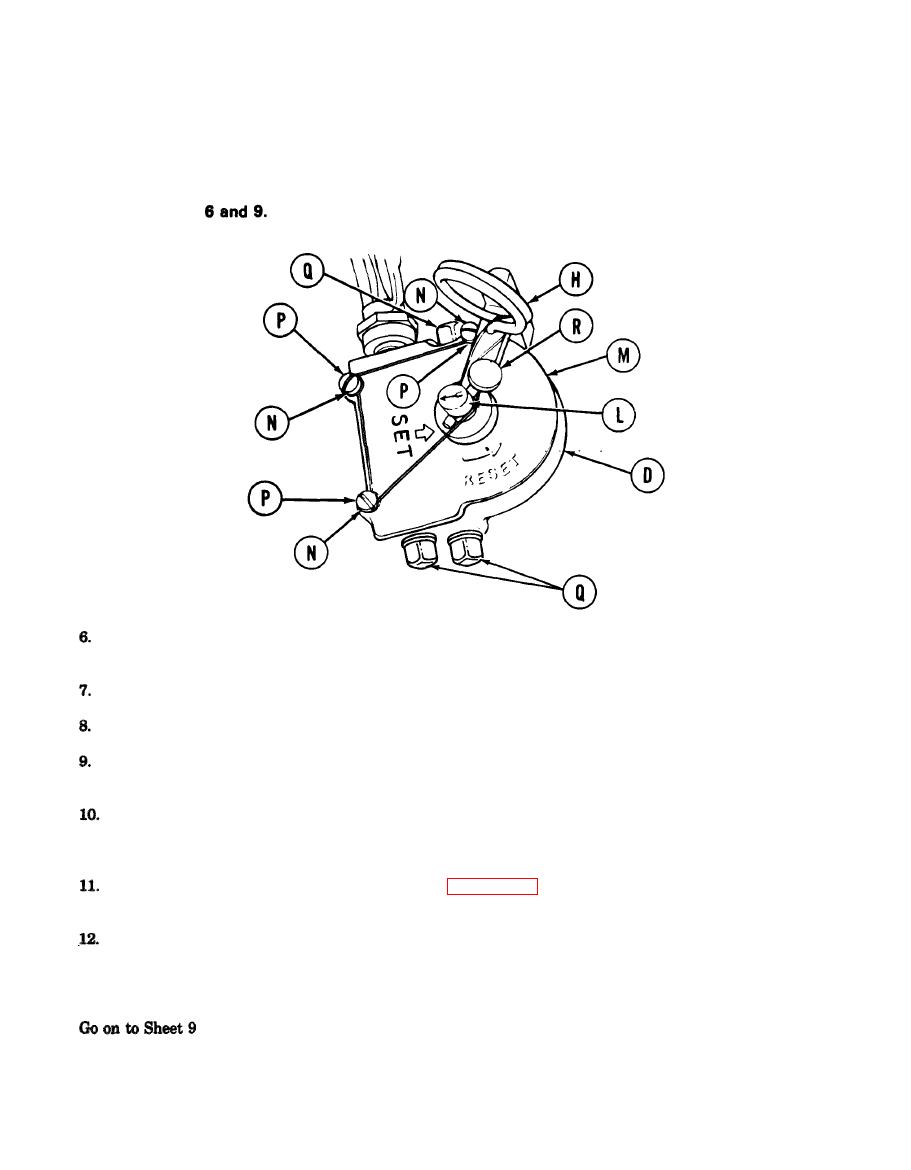
Rotate cover shaft (L) counterclockwise until arrow on shaft (L) points at SET arrow on exterior
face cover (M).
Position cover (M) on housing (D) of valve.
Using screwdriver, secure cover (M) to valve with screws (N) and washers (P).
Check that shaft (L) is still turned fully counterclockwise. If not, reset valve by alining arrow on
shaft (L) with SET arrow on cover (M).
Check operation of valve by releasing with cable, resetting with handle, releasing with handle, and
resetting several times. Verify that pin in bottom of valve is released and retracted each time.
Leave in SET condition.
Coat plug (Q) with sealing compound (Item 30, Appendix D). Using adjustable wrench, install
three plugs (Q) into housing (D).
Using slip joint pliers, install new lead seal (R) through cover screws (N) and safety pin (H). Then
go to step 24.
TA140946
21-43

