

TM 9-2350-222-20-1-5
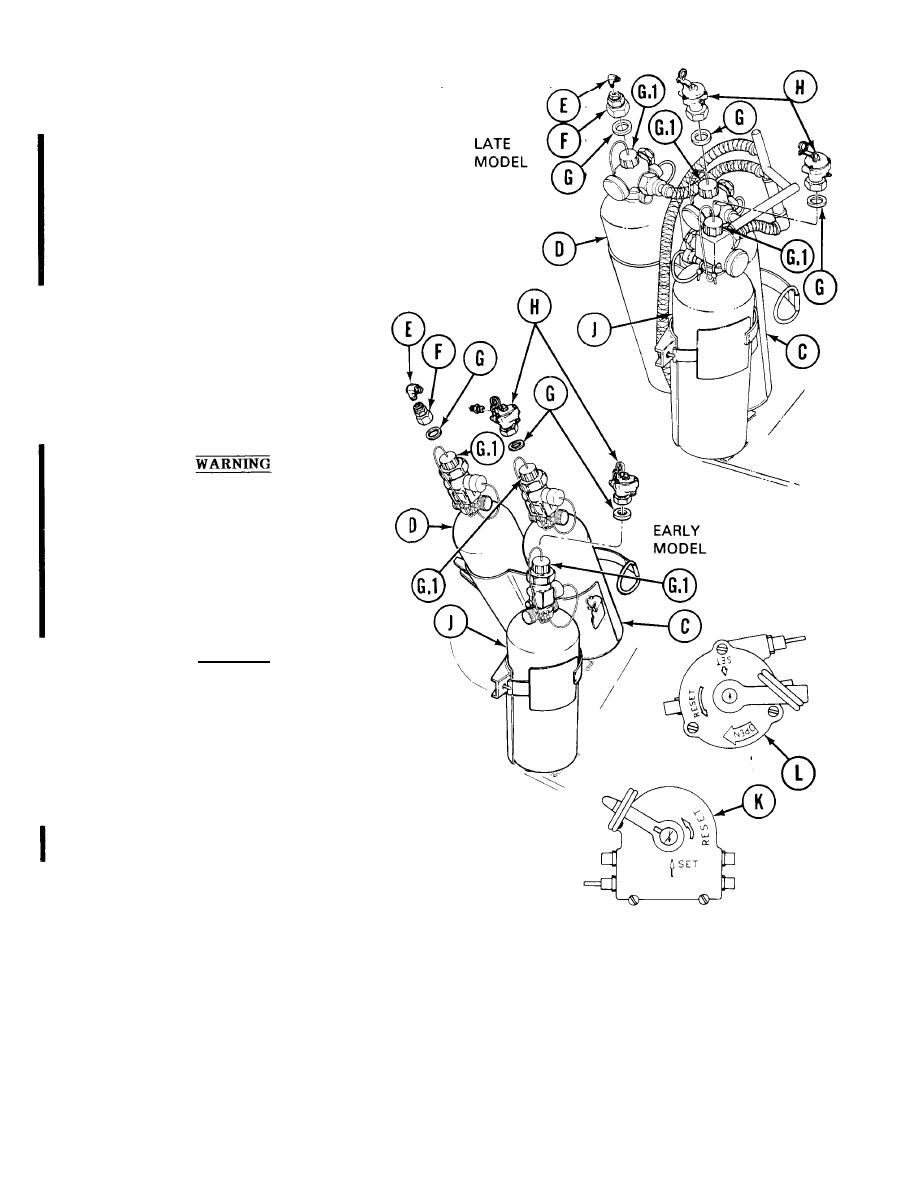
CONTROL VALVE ASSEMBLY REPLACEMENT (Sheet 3 of 12)
NOTE
Even though some cylinder
heads (F) can be disassem-
bled, each must be removed
as one part. If flange comes
out with elbow, hold flange
with 3/4 inch wrench.
3.
Using adjustable wrench on elbow (E) and
1-1/2 inch wrench on head (F), remove
elbow (E) from head (F).
4.
Using 1-1/2 inch wrench on head (F),
remove head from cylinder (D).
Remove washer (G) from cylinder (D).
5.
Safety cap (G.1) must be
installed whenever a fire
discon-
extinguisher is
Accidental dis-
nected.
charge of cylinder can cause
injury to personnel and/or
damage to equipment.
Install safety cap (G.1) on cylinder (D).
5.1.
CAUTION
Be careful while doing step
6 so extinguisher cylinder
does not turn and pull on
discharge cable, or fire
extinguisher will discharge.
Using 1-1/2 inch wrench and automotive
6.
wrench, remove two control valves (H)
and washers (G) from cylinders (C) and
(J). Install safety cap (G.1) on cylinders
(C) and (J).
NOTE
Steps 7 thru 13 describe removal of four-port valve (K). Steps
14 thru 19 describe removal of three-port valve (L). Although
four-port valve is latest model there are some three-port valves
on current vehicles.
Go on to Sheet 4
Change 4

