

TM 9-2350-222-20-1-5
MOLDBOARD CUTTING EDGE REPLACEMENT (Sheet 2 of 3)
NOTE
If nuts or bolts are damaged or rusted in place, it may be
necessary to remove by cutting out with cutting torch. Use all
other methods available to attempt removal before using
torch.
4.
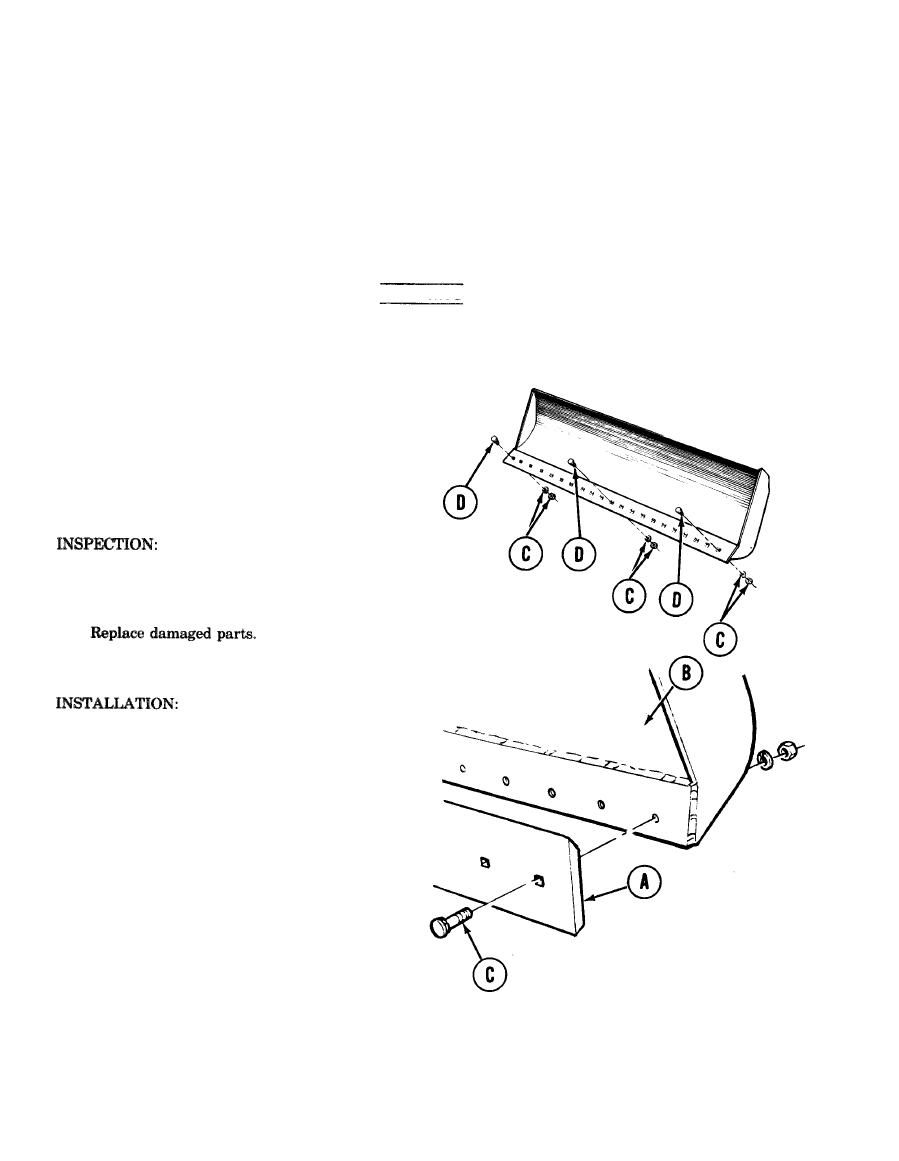
Using socket, remove three nuts and lockwashers (C). Throw lockwashers away.
WARNING
Cutting edge may be loose on moldboard at this point. Use
caution when removing last three bolts. Have all personnel
stand clear of cutting edge.
5.
Using hammer and punch, drive out three bolts
(D). Remove center bolt first, then end bolts.
6.
Using sledge hammer, rap cutting edge sharply
until it falls off. Make sure personnel stand
clear.
Check for damaged cutting edge and damaged
1.
nuts and bolts.
2.
1.
Lower moldboard to about. 6-8 inches from
ground and block in position. Set blocks behind
edge of moldboard.
2.
Lift cutting edge (A) onto moldboard (B).
Position cutting edge (A) with beveled side onto
moldboard (B).
3.
Install three bolts (C) into each end and center
of cutting edge (A) and moldboard (B) as shown.
4.
By hand, install three nuts and new
lockwashers (D) onto three bolts (C).
Go on to Sheet 3
TA141109

