

TM 9-2350-222-20-1-5
REAR DRAIN VALVE CONTROL LEVER ASSEMBLY REPLACEMENT (Sheet 3 of 4)
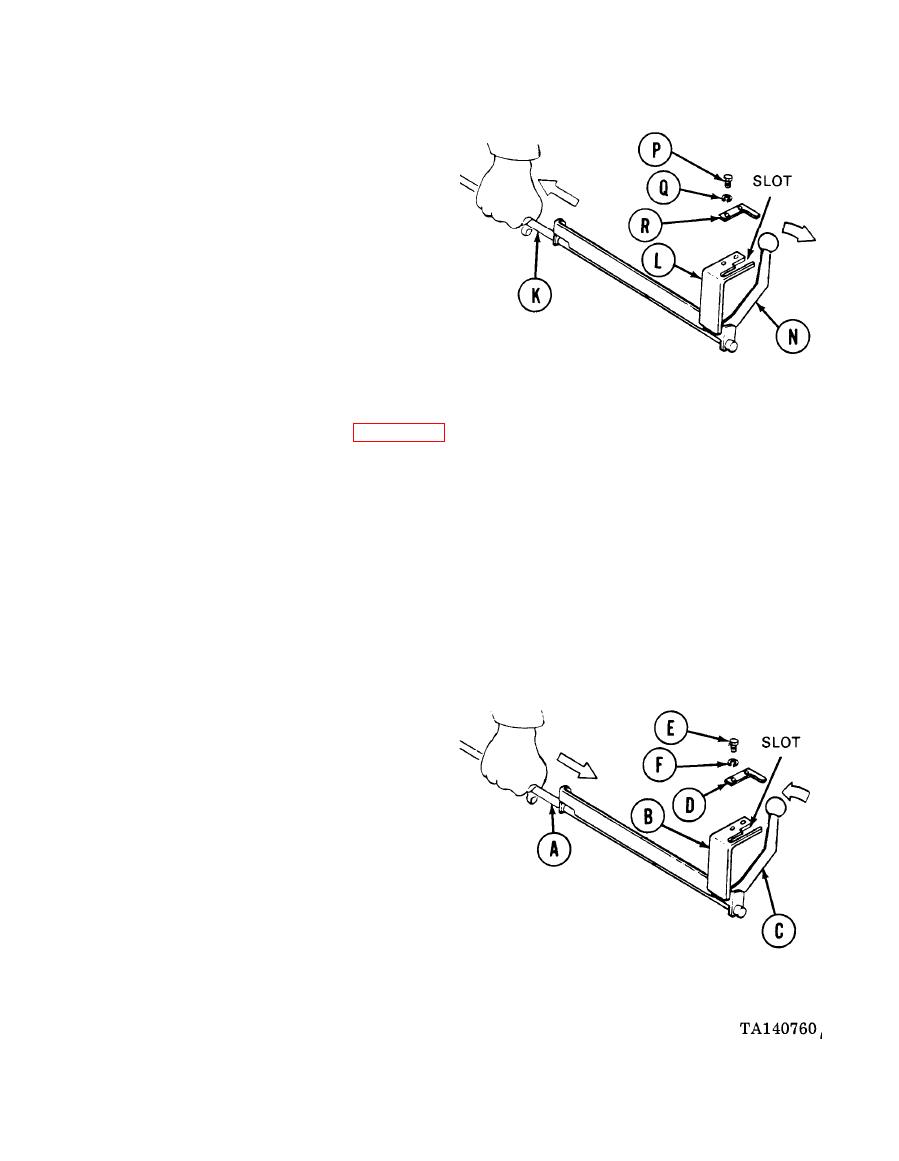
Using 5/16 inch wrench, remove two screws (P)
9.
and lockwashers (Q). Remove lever stop (R).
Throw lockwashers away.
Pull control lever (N) out of slot in bracket (L).
10.
Pull shaft (K) and control lever (N) out of
11.
bracket (L).
Secure lever (N) in vise and using hammer and
12.
1/2 inch punch, drive shaft (K) from lever (N).
CLEANING AND INSPECTION:
1.
Using dry cleaning solvent (Item 54, Appendix D) and rags, clean all parts.
Inspect parts for bends, cracks, or other defects. Replace defective parts.
2.
INSTALLATION:
1.
Push shaft (A) through holes in bracket (B) and hole in control lever (C), Make sure control lever
(C) is not installed backwards.
Push control lever (C) in slot in bracket (B).
2.
Line up holes in lever stop (D) and holes in
3.
bracket (B).
4.
Install two screws (E) and new lockwashers (F)
attaching lever stop (D) to bracket (B).
Go on to Sheet 4

