

TM 9-2350-222-20-1-5
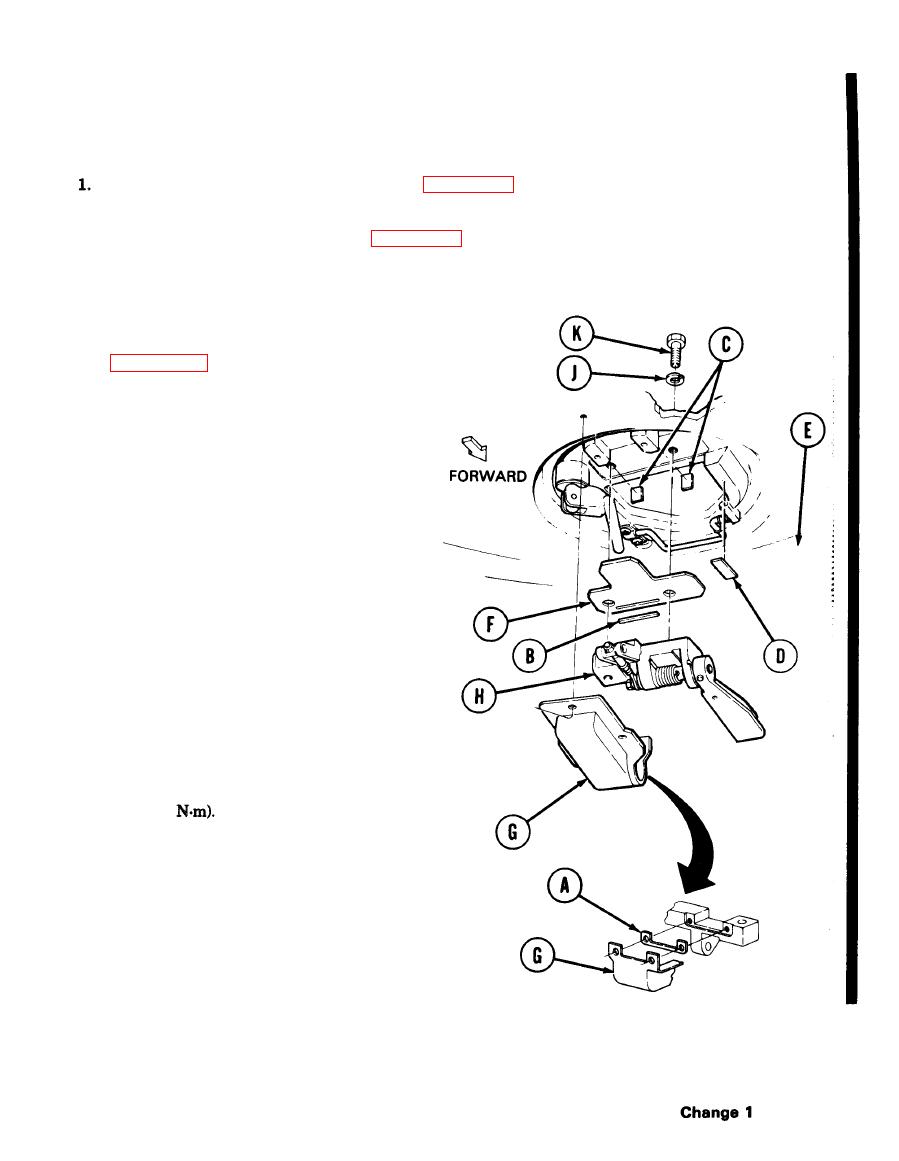
DRIVER'S HATCH NIGHT VIEWER LATCH REPLACEMENT (Sheet 3 of 6)
CLEANING AND INSPECTION:
Using putty knife and steel wool (Item 55, Appendix D), remove old sealant and adhesive from hatch
and all parts.
2.
Using dry cleaning solvent (Item 54, Appendix D) and rags, remove retaining debris and dirt.
3. Inspect all parts for damage or wear. Replace defective parts.
INSTALLATION:
1.
With putty knife, apply adhesive (Item 4,
(A), (B), (C), and (D). Apply adhesive to
mating surfaces on hatch (E), plate (F),
and cover (G).
2.
When adhesive is tacky, aline and apply
new gaskets (A), (B), (C), and new pad (D).
NOTE
Before performing step 4, get
another person to help aline
holes in plate (F) and latch
mechanism (H) with holes in
hatch (E).
3.
Place new lockwashers (J) on two screws
(K) and apply sealing compound to screw
threads.
4.
Using fingers, start screws (K) through
hatch (E) into latch mechanism (H).
5.
Using 3/4 inch socket and torque wrench,
tighten two screws (K) to 95-125 lb-ft
(128-169
Go on to sheet 4
TA253617

